Most sushi enthusiasts appreciate the unique flavor of fresh wasabi, but few realize that you can grow your own at home. Although wasabi is often considered difficult to cultivate, with the right conditions and care, you can successfully produce this flavorful green ingredient in your garden. In this guide, you’ll learn about the ideal growing conditions, planting techniques, and maintenance tips to ensure your wasabi thrives, bringing your sushi-making experience to a whole new level.
Key Takeaways:
- Environment: Wasabi thrives in cool, shaded areas with high humidity and consistent moisture, mimicking its natural stream-side habitat.
- Soil Requirements: Use well-draining, rich, and organic soil to promote healthy growth, ensuring that it maintains adequate moisture levels without becoming waterlogged.
- Patience: Growing wasabi takes time, typically 2-3 years before the roots can be harvested, so be prepared for a long-term commitment.
Understanding Wasabi
For sushi lovers, wasabi is an imperative ingredient that adds a unique flavor and heat to dishes. Derived from the wasabi plant, this spice has deep roots in Japanese cuisine. However, many are unaware that genuine wasabi is often rare and commands a higher price than its common counterpart, horseradish. By understanding the plant and its nuances, you can appreciate the difference in flavors and textures that authentic wasabi brings to your sushi experience.
What is Wasabi?
At its core, wasabi is a pungent green paste made from the rhizome of the Wasabia japonica plant. This plant is native to Japan and thrives in the cold, mountain streams of the region. The flavor it delivers can range from sharp and intense to subtly sweet, making it a beloved companion for sushi and sashimi dishes. When freshly grated, wasabi offers a vibrant taste that enhances rather than overpowers your meal.
Varieties of Wasabi
Against popular belief, not all wasabi served in restaurants is the authentic product. The most common variety is true wasabi (Wasabia japonica), but there are several cultivated varieties, including “Daruma” and “Koshino,” each with unique taste profiles and growing requirements. Many restaurants may use a blend of horseradish and food coloring as a substitute, which lacks the authentic flavor of real wasabi.
A true wasabi plant typically takes 18 months to 2 years to mature fully, and its flavor can vary based on the growing conditions. When you grow your own wasabi, understanding these varieties can help you choose the best one suited for your palate and gardening setup. Opting for authentic plants means you can enjoy the complex taste of fresh wasabi, elevating your sushi-making experience significantly.
Preparing for Cultivation
Some careful planning is necessary before you begin on growing your own wasabi. You need to ensure that your environment mimics the conditions of its natural habitat, focusing on aspects like location, soil, and water availability. By achieving the right conditions, you will increase your chances of successfully cultivating this unique plant for your sushi creations.
Choosing the Right Location
Between shaded areas, moisture levels, and temperature, selecting a suitable location is imperative for wasabi cultivation. Ideally, you should choose a site that provides dappled sunlight and protection from harsh winds. This mimics the plant’s natural habitat found alongside stream beds in the wild.
Soil Requirements
To grow wasabi successfully, you must provide well-draining, nutrient-rich soil with a pH level between 6.0 and 7.0. Amending the soil with organic matter can help achieve the desired texture and fertility, enhancing the plant’s growth and flavor profile.
And, when preparing your soil, consider mixing in organic compost or well-rotted manure to boost nutrient content. Avoid compacted soils and ensure adequate drainage to prevent root rot, as wasabi thrives in the cool, moist conditions found near water sources. By focusing on these soil requirements, you create an ideal environment for your wasabi plants to flourish.
Planting Wasabi
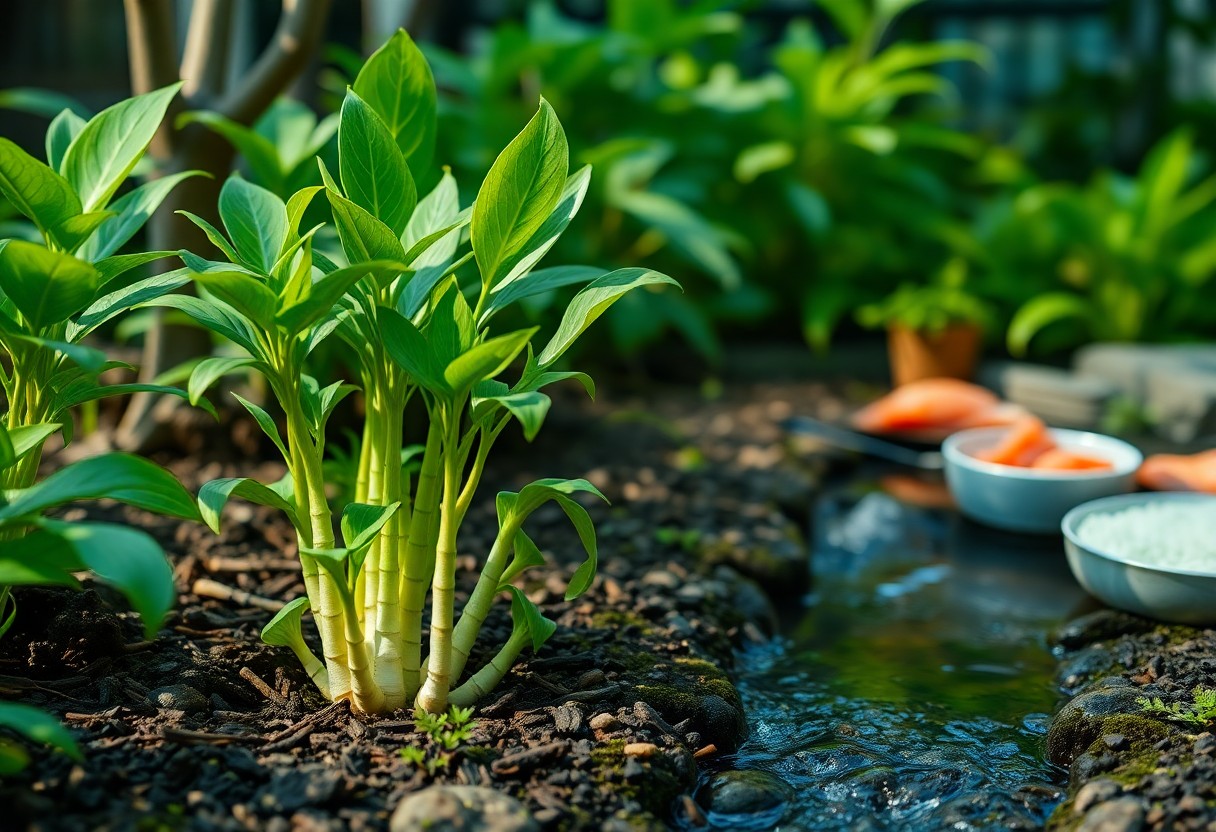
Many enthusiasts find planting wasabi a rewarding endeavor, especially given its unique flavor that enhances sushi dishes. To successfully cultivate wasabi, you’ll need to provide a suitable environment that mimics its native conditions, with cool, shaded spots and consistently moist soil. Prepare your planting area meticulously, ensuring well-drained, rich, and slightly acidic soil to support your new plants.
Propagation Methods
The most common propagation methods for wasabi include rhizome division and seed planting. While planting seeds can be more challenging and time-consuming, dividing an established rhizome is often the preferred way to propagate wasabi swiftly, enabling you to grow new plants from existing ones.
Planting Techniques
Propagation begins when you choose healthy, mature rhizomes for division, which should be at least a year old. Cut them into sections, ensuring each piece has at least one bud, then bury them about two inches deep in the prepared soil. Water them thoroughly after planting to promote root development, and keep the soil consistently moist to support your wasabi’s growth.
Consequently, providing the right environment is vital for successful growth. Wasabi thrives in shaded, cool areas, so consider using a shade cloth if planting outdoors. Regularly monitor soil moisture and avoid waterlogging, as this can cause root rot. With the right techniques and care, your wasabi plants will flourish, giving you fresh wasabi for your sushi needs.
Caring for Wasabi Plants
Once again, to cultivate healthy wasabi plants, you need to pay attention to their specific care requirements. Wasabi thrives in cool, shady environments with consistent moisture. You must monitor their growth regularly, as these plants can be sensitive to changes in temperature and light. Providing the right care will ensure that your wasabi develops a robust flavor, preparing you for a delightful sushi experience.
Watering and Drainage
To promote optimal growth, ensure your wasabi plants receive plenty of water, but also provide excellent drainage. They prefer consistently moist soil, so regular watering is vital, especially during dry spells. However, standing water can lead to root rot, so it’s a good idea to use raised beds or pots with drainage holes to keep the root system healthy.
Pest and Disease Management
Wasabi is prone to certain pests and diseases, so monitoring your plants is vital for maintaining their health. Regularly check for aphids, slugs, and fungal infections that may affect growth. If you notice any signs of infestations, act promptly by using organic insecticides or natural repellents to combat the issue.
Even minor infestations can escalate quickly, so keeping an eye out for signs of pests such as discoloration or wilting leaves is important. Hygiene plays a significant role in pest and disease management; ensure your gardening tools are clean, and avoid overcrowding the plants to improve air circulation. Implementing these practices will help maintain the vigor of your wasabi, allowing it to flourish in your garden.
Harvesting Wasabi
After nurturing your wasabi plants for about 18 months to 2 years, you’ll reach the exciting stage of harvesting. It’s important to harvest at the right time to ensure maximum flavor and quality. The rhizome is the part used for sushi and should be dug up with care to avoid damage. Timing your harvest will significantly impact the taste of your wasabi, so pay close attention to the signs of maturity.
Signs of Maturity
Wasabi plants show their readiness to harvest through several signs, including the size of the rhizome and the color of the leaves. A mature rhizome will be about 6-8 inches long and 2-3 inches wide, while the leaves will start to yellow slightly. When you notice these changes, it’s a good indicator that your wasabi is ready for harvest.
Harvesting Techniques
After determining that your wasabi is mature, using the right harvesting techniques helps ensure you don’t damage the plant or the rhizome. Start by carefully loosening the soil around the base of the plant using a trowel or garden fork. This allows you to lift the rhizome without breaking it. It’s important to handle the rhizome delicately, as excessive force could harm the tender roots and affect yield.
After you loosen the soil, gently pull the plant upwards while supporting the base. Make sure to keep the rhizome as intact as possible, as this will enhance the storage and usage quality of your wasabi. Once harvested, rinse the rhizome under cool water to remove any soil debris. You can then store it in the refrigerator, wrapped in a damp cloth, to maintain freshness until you’re ready to use it.
Using Homegrown Wasabi in Sushi
Not only does homegrown wasabi elevate your sushi, but it also offers a fresh and vibrant flavor that you won’t find in store-bought varieties. When you harvest and prepare your own wasabi, you can enjoy the delightful peppery kick that enhances the overall experience of your sushi dishes. Incorporating your wasabi into sushi will make your creations stand out and impress your guests at any gathering.
Preparation Methods
An ideal way to prepare wasabi is by grating the rhizome. Using a traditional wasabi grater or a fine microplane, you’ll create a fresh paste that retains the vital oils and flavors. Mix it with a bit of water, letting it rest for a few moments before serving, as this allows the flavors to develop. Avoid preparing too much in advance, as freshness is key to a delicious wasabi experience.
Pairing with Sushi
By integrating your homegrown wasabi into sushi, you create a harmonious blend of flavors that complement the fish and rice perfectly. Each bite becomes an explosion of taste, heightening the overall enjoyment of the dish.
Hence, when pairing wasabi with sushi, consider the type of fish you are using. Wasabi works beautifully with fatty fish like salmon and tuna, helping cut through their richness. It also pairs well with whitefish, enhancing its delicate flavor. For a zesty kick, you can try mixing wasabi with soy sauce for dipping, but be cautious not to overpower the natural flavors of your carefully prepared sushi. Experiment with various combinations to discover what suits your palate best!
Final Words
With this in mind, growing your own wasabi can be a rewarding endeavor that enhances your sushi experience. By following the steps outlined in this guide, you can create a suitable environment for your wasabi plants, ensuring optimal growth. For detailed guidance on your planting journey, refer to this resource on How to Plant and Grow Wasabi. Soon, you’ll be enjoying the unique flavors of homegrown wasabi in your dishes!
FAQ
Q: What are the ideal growing conditions for wasabi?
A: Wasabi thrives in cool, moist environments. The ideal temperature range for growing wasabi is between 45°F to 75°F (7°C to 24°C). It prefers partial to full shade and requires a high humidity level. The soil should be well-draining, rich in organic material, and slightly acidic, with a pH level of around 6 to 7. If you’re growing wasabi indoors or in a greenhouse, ensure proper ventilation to maintain humidity and temperature.
Q: How long does it take for wasabi to grow before it’s ready to harvest?
A: Wasabi typically takes about 18 to 24 months to mature before it can be harvested. If you’re growing it from seeds, it may take longer as it can take a few months for germination and the development of seedlings. Once planted, keep an eye on the size of the rhizomes, as they should reach about 6 to 8 inches in length for optimal flavor and quality before harvesting.
Q: Can wasabi be grown in pots or containers?
A: Yes, wasabi can be grown in pots or containers, provided the conditions are suitable. Choose a deep container to accommodate the rhizomes, and ensure it has good drainage to prevent waterlogging. Using a high-quality potting mix rich in organic matter will support healthy growth. Placing the pot in a shaded area that mimics its natural habitat will help maintain the required moisture and cool temperatures.